Drawing is an important part of designing your bonsai - laying things out on a page can help you understand your design and think through all of the implications of the design. There are many different ways to draw- pencil, watercolour, marker pens, ballpoint, charcoal. One method of drawing that has become increasingly popular is to use layer-based image editing to mock up a 'virtual styling' of your bonsai. Some bonsai professionals offer virtual styling as a service.
Layer-based image software is the most flexible and powerful way of editing photographs, used professionally to retouch and composite images for magazines, design mockups and advertising. The gold standard tool is Adobe Photoshop, and if you have a license for Photoshop, most of these instructions can be used for working up virtuals there. This tutorial uses GIMP, a free layer- based image editor. You can download GIMP here (for windows, mac or linux), and there are some further learning resources here.
When you first launch GIMP, you can go to the 'file' menu, choose 'open' and select an image to work on.
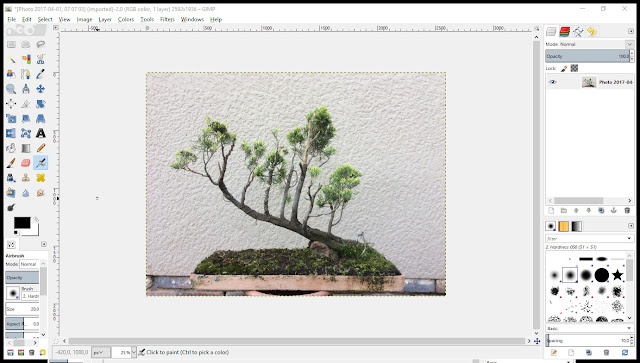
On the right, is the layers and brushes dock. Layers allow you to stack up transparent 'sheets' that you can draw on, switch on and switch off, move around independently of each other and use to have multiple options for your bonsai.
Photographs for image editing
Your tree should be photographed under bright light, with a well-contrasting flat background, at eye level, as close as possible to the intended front for your tree (remembering to consider a few different possibilities for the front).
Cropping your tree out from the background
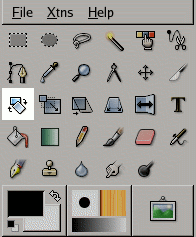
Having imported the photograph of your tree, we want to 'cut it out' from the background, so that we can look at the tree without any distractions. GIMP has a number of different selection tools you can use to select the tree, then cut and paste it into a new layer (using the edit->cut and edit->paste-->as new layer commands). I find the foreground select tool and the select by colour tools to be the most useful in this case, but this video runs through how all of the selection tools work.Once you have pasted your tree onto a new layer and switched off the old base photograph alyer, you'll see a grey checkerboard pattern behind the tree. This checkerboard represents the areas that are transparent. To avoid looking through the image to the transparency behind everything, you can then create a new layer, lower it to the bottom in the layer dock, and use the paint bucket tool to paint that layer black (or white, or grey, or some other flat colour that contrasts well with your tree). This helps you see the foliage and branch structure cleanly without clutter. In general, deciduous trees in winter look best on a black background, while conifers look good on a white background if they have dark foliage.
It's always a good idea to make a copy of the layer before you work on it- so that you can go back to the original when you need to change it later. At the bottom of the labour toolbar isthe copy button- the two cards/squares on top of each other- select the tree's layer, then rpess this button and you'll get a copy of it. Move it to the bottom of the layer stack, so you have it to use later.
Changing the planting angle
We can use the 'rotate' tool to adjust the angle of the tree- select the rotate tool, then make sure that the tree's layer is selected before adjusting it. As you drag your mouse, you'll see the preview of the tree rotating so that you can choose the new growing angle.
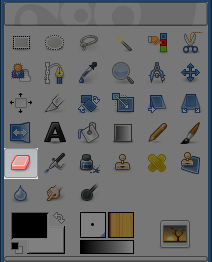
Once you've done that, you can use the erase tool to erase the pot that is now at the wrong angle. We'll discuss putting it back into a pot further down in this tutorial
Bending branches
In much the same way as we rotated the whole tree, we can select an individual branch, cut it and paste as a new layer (as we did above to select the tree from the background) and then rotate the individual branch. When you select the rotate tool, you will see a circle and crosshair: this is the point that the whole rotated layer will rotate around. You can drag this base point down to the base of the branch before starting the rotation. Using this tool, you can begin to set the 'skeleton' of your tree.Pruning and developing branches
There are two tools you will use to prune and grow your trees- the Erase tool, when selected, will allow you to shorten foliage pads, cut back branches, or remove whole trunks.
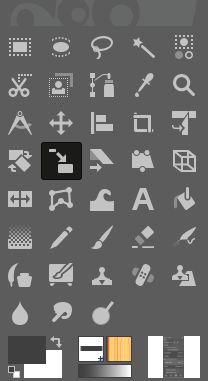
The clone or rubber stamp tool is a little more complicated to use but very powerful, allowing you to mask foliage pads that match the existing texture of the tree's foliage.
To use it, make sure you are working on the tree layer, select the clone tool, then hold down the 'ctrl' key and click on the source area you want to copy the foliage from. Now when you click and drag with the mouse, you will see a crosshair at the source, copying whatever is under the cursor and painting it where you move the cursor. You can use this to thicken or widen a foliage pad, or copy from one part of the tree to another to flesh out and refine a branch's foliage. Step by step demonstration here
 |
| after pruning and growing out branches with the erase and clone tools |
Jins and Sharis
To make a jin or shari, you will select the area you want to jin (I find the Intelligent Scissors select tool to be the best one for this), then create a new layer, and use the paintbucket to fill the selection you have just made with white. This will give you a solid white shape overlaying where you want your jin and shari to be- which doesn't look very realistic- we'll be fixing that in the next step.
Instead of just switching layers on and off, we can use the layer overlay control to adjust how transparent your jin layer is. Slide the layer transparency slider down from 100%, watching the white jin sections until the transparency makes the jin look realistic- showing shadows and texture, but still showing a good contrast against the normal bark.
Repotting
Finally, we can take an existing pot, isolate it in the same way as we did to select the tree, and paste it into this image. If needed, you can use the Scale tool to adjust the size of the pot to suit the tree. Now, you can also bring up the copy of the tree layer from before it was rotated, and erase the existing tree, and it's pot, leaving the landscaping under your tree. If you order the layers so that the pot is on top, the potscaping below, and the tree beneath that, the parts will all cover each other in the right order.
Saving your file
Once you are happy with your virtual styling, you can use the File->Export command to save a JPEG image for printing, emailing or sharing on facebook. Type the whole name eg. reallyawesometree.jpg WITH THE EXTENSION so that GIMP knows to export a JPG (or a GIF or PNG or TIF etc. if you want one of those other formats for some particular use). If you want to save the image so that you can come back later and work on the layers, you should use the File->Save command, and GIMP will save in .XCF format, it's own internal file format. Saving this way means that you won't easily be able to share this file over the internet- it is large, and most people won't have GIMP installed to view it- but you can come back at any time and all of your layers will still be available to use. The end result of my mockups above is available HERE as a 15 Mb XCF so that you can see how the various layers have been cut out and combined.






No comments:
Post a Comment